Damaged Brickwork Replacement
Brickwork replacement is not exactly as hard and annoying as it sounds. You can just do it for yourself with so much fun. Now, the point is when you go for replacing a damaged brick? Well, there may be thousands of reasons in offense of replacing a damaged brick. A few of them are crumbling or cracking brick, or the front face of the brick is fade by the freeze-thaw action, or there may have been a pipe which is removed but it leaves a hole or the brick(s) become stained, or simply nothing you just have to remove or repair this to access the cavity for cleaning.
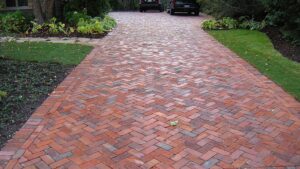
Reasons to replace damaged brickwork
The reason is not only related to beauty but it can also lead to a load of issues. If the brick is broken or cracked, it’s too easy to penetrate water and moisture through the holes into the interior, and creating a dump on the interior wall is so easy. Most of the cases are causes stains and black mold which not only looks dirty but also a great matter related to health. Though it seems very low concerning matter whether facing wall can cause some serious issues for your sweet home and this is not a matter of joke. So this could be replaced as early as possible. But if there are more than one bricks that are damaged or cracked then you must consult with a professional builder or surveyor. Because this may be a sign of something more serious or important issue.
Right-sized brick and right colored mortars matters
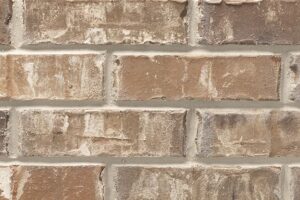
The process of brickwork replacement is not a difficult task. With very little knowledge one can easily complete this job by following some easy steps. The first step is to find out the right size and right color brick which matches the most to your existing wall. After you find the right brick now is the time to find out the right color mortar. This part of the brickwork replacement is a little bit difficult.
The color of the mortar should be matched properly so that it looks great. But if it is not, then it will stand out like a sore thumb in the wall. The matter is that the sand and cement you use just fix the color of the mortar. Now, this part is a little bit tricky and you may go through the process of trial and error. You should mix different types and colors of sand and cement to get your preferred color of the mortar. And it is a bit hard to get an accurate color if you have an old aged home.
You may also check our Brick Repair Services.
Prepare the brick
Now we have the right color and sized brick and the most matched colored mortar in our hand, so we can now start our main job of brickwork replacement. The first step is to prepare the new brick for replacement. Take a bucket full of water and place the brick into the water ensuring submerged fully. It is not necessary but you may do it for a better result.
Drill out the old mortar
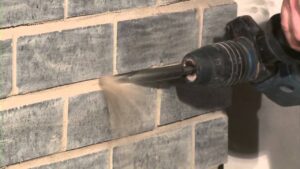
Now is the time to drill out the old mortar from the wall to remove the damaged brick. Before starting, put on a pair of safety goggles to protect your eyes from the flying shards. You will need an 800W decent drill. Try to use a 6-8mm drill. Start drilling from outside the old mortar to inside and try to make close holes. Drill the hole brick. Be careful that your holes are not too close to the other surrounding bricks because it will be a great hamper if any good bricks are drilled. You can use an angle grinder instead of a drill but if you are not professional using this, you should choose drill.
Remove the Brick and clean the surface
Now, after drilling the hole brick and the mortar, take a hammer and a bolster and gently knocking out the mortar, first at the sides, then at the bottom, and at last the top. After removing all the mortars the brick has become loose and then jiggle from side to side and pulling forward until it comes out. When the brick comes out clean all the old mortars with a hammer and bolster. And for the debris and dust just use a small hand brush.
Make sure the existing walls are wet
Wet all the bricks of the wall and make sure the edges are wet. The wet bricks suck less moisture from the mortar mix and it gets enough time to dry. Now prepare a mixture of mortar to a consistency of 5:1 (1 cement to 5 soft sand). Now lay an adequate bed of the mortar on the hole by a pointing trowel. Make the base and then apply it on the sides.
Place the Brick and you’re done
Now take the wet brick and cover its top fully with mortars. Insert the brick into the hole and gently push it to get it the right place. Fill the gaps around the sides with the remaining mortars and make sure that all gaps are filled properly. Clean all the joints with the backside of the trowel and make it as smooth as you can. And look, you’re done! Congratulations!
Also, consider reading our Brick Replacement-Restoration & Masonry post.
An important point to be noted
Here’s one more thing that you should not replace more than 2 bricks at the same time.
Replaced bricks should be untouched at least 7 days before replacing another. At last, brickwork replacement is a very simple job. Just follow the steps mentioned above and finish it artistically. So what are you waiting for?